Categories
Sport Various

Kitesurfing in Sardinia: the photos of the best 3 Kite spot of Sardinia

In this post we will introduce and we will give you photos of the 3 best kite spot of Sardinia, the beutiful island of the mediterranean sea: the 3 best kite spots are Punta Trettu, Cagliari and Porto Pollo.

Kitesurf in Punta Trettu, Sardinia
Punta Trettu by Drone

Where to Kitesurf in Sardinia

The winds that blow on the coasts of Sardinia are really good for all sailing sports including kitesurfing. Kitesurf is no longer considered an extreme sport but, thanks to the evolution of equipment and the new teaching techniques, is considered a sport accessible to anyone who likes to enjoy it.From the South of Sardinia to the North, there are 3 main kite spots that are considered among the best kite spot in Europe: Punta Trettu, Cagliari and Porto Pollo.

Kitesurfing in the Southern Sardinia: Kitesurf in Cagliari and Petrol Beach

In the south of Sardinia, there are 2 main kite spots: Cagliari and Petrol beach. For both these kite spots, the best winds are all wind blowing from south and east. other winds like mistral (blowing from north-west) are offshore and for this reason, for kitesurfing, a rescue boat is always needed. Cagliari is the Capital of Sardinia island and is a very windy place with a big beach, the Poetto beach. Here at the Poetto Beach of Cagliari, kitesurfing is allowed from October to end of April (during the summer season, from May to September, kitesurfing is not allowed because the beach is too crowded with swimmers and there are no kite zones) and changing “bus Stop” (Poetto beach is divided in “bus stop”), conditions for kitesurfing are different and tailored to all kite levels.
During the summer (months from May to September), to kitesurf in the area of Cagliari, when thermal wind and wind from south and east are blowing, kiters are moving to Petrol Beach.  Located just a 20 minutes from the center of Cagliari, Petrol Beach (the right name is La Maddalena Spiaggia) is the right kite spot for kitesurfing and to learn to kitesurf. Here at Petrol beach, the best wind is the thermal wind that remains steady all the afternoon, with a flat water.

Kitesurfng in Cagliari, Sardinia
Kitesurf in Cagliari

Kitesurfing in the Southwest of Sardinia: Kitesurf in Punta Trettu

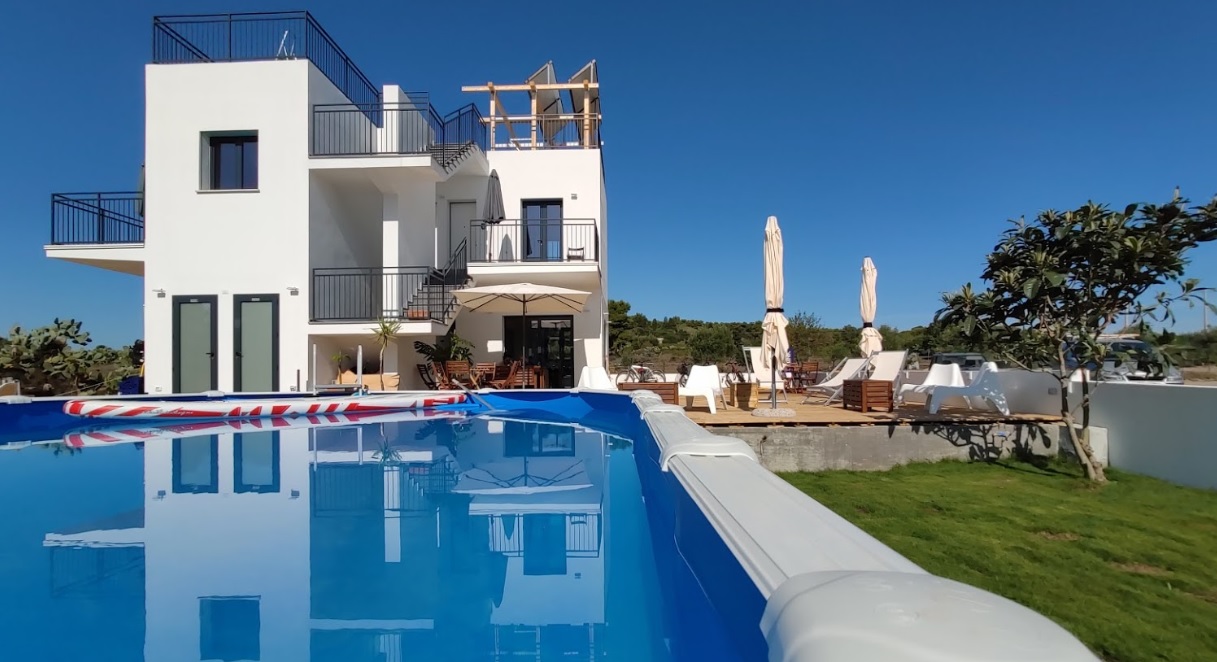
Along the southwestern coast, Punta Trettu is one of the best kite spots in Sardinia and Europe, one of the best in the world. Punta Trettu is considered a Kitesurf Paradise because the flat and shallow water, the sandy bottoms and the wind that blows steadily all year round. Thanks to the position of the bay, Punta Trettu is exposed to all winds: Mistral, Ponente (west), Sirocco (south-east), levante (east) and Libeccio (south-west). Due to this high exposure to the winds, enjoy kitesurfing in Punta Trettu is almost always guaranteed. In Punta Trettu, one of the best kite center if the Punta Trettu Kite Center that offers also accommodation at the Punta Trettu Kitesurf House Sardinia.

Punta Trettu Kitesurf House Sardinia
Punta Trettu Kite House Sardinia

We can say that Punta Trettu Kite Beach is the best Spot for Kitesurfing Sardinia.

Kitesurfing in the Northern  Sardinia: Kitesurf in Porto Pollo

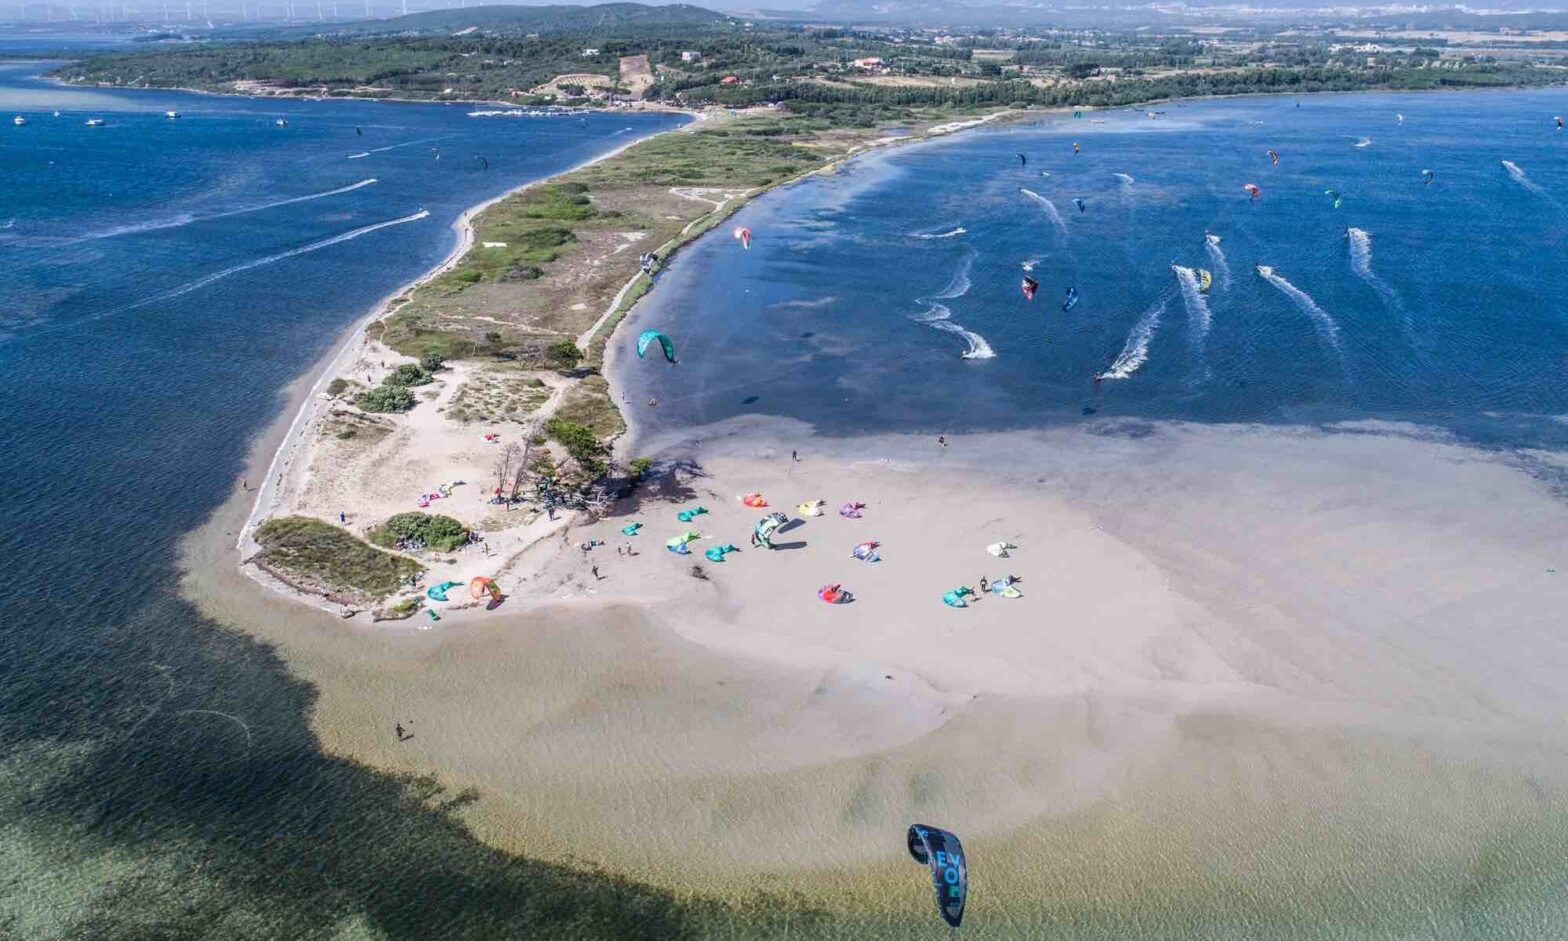
Porto Pollo, in the north of Sardinia, is one of the most famous places for windsurfing and kitesurfing. It became famous in the 80s thanks to windsurfing events and regattas. The spot of Porto Pollo consists of a strip of sand that connects Sardinia to the Isola dei Gabbiani and divides the sea into two bays, one to the west and one to the east. Nowadays Porto Pollo is always frequented by many windsurfers and also by many kitesurfers as the winds blow very frequently, even if they are almost always very gusty.
Porto Pollo is located about 35 km from Olbia, after Palau, from which, to reach Porto Pollo, you have to move in the direction of Santa Teresa di Gallura. Once you meet the signs for Isola dei Gabbiani, just continue for about 5 km before reaching the destination, which will suddenly appear on the right.
The eastern bay is reserved for windsurfers, the area for kitesurfing is located to the western bay, on the way to the Isola dei Gabbiani (island of seagulls). The kite zone is not very large, so the kite courses are held with a support boat that takes the students out into the water. The dunes along the bay provide refuge for non-kiters looking to get a tan. There are also a couple of cafes and bars on the beach.

Kitesurf in Porto Pollo Sardinia
Kitesurf in Porto Pollo
Categories
Photography

Filters to Help You Create Memorable Transparencies

During our days as photo lovers we frequently find that people want to know what filters we carry when we create images in the field. The information listed below provides a starting place for filters you might consider when your photography takes you outdoors.

Polarizing Filter: A polarizing filter has been considered a sky-darkening filter for many years; photographers also know that it can be used to remove reflections from shiny surfaces. For outdoor photographers, shiny surfaces include bodies of water and shiny foliage. You’ve probably heard that polarizing filters are used at a 90-degree angle to the sun, if you wish to use them at their maximum effect. To find this angle, stand with your back to the sun and extend your arms straight out from your shoulders. The direction to which each arm is pointing will provide maximum polarization. Naturally, you will receive some benefit from the polarizing filter if the angle between your camera and the sun is less than 90 degrees. How much benefit you’ll receive depends on this angle.

The easiest way to see the effect of this filter is to face toward the direction you wish to photograph and hold the filter up to your eye. View the scene while turning the filter, and you will see the effect it will have on your photograph. We use the Cokin P-size filter system because we can leave the Cokin filter holder on the camera lens while viewing the scene. Additionally, using this system means we only have to purchase one set of filters, which keeps our expenses down and our camera bag lighter.

Warming Filters: The 81-series filters are warming filters. These filters add warmth to a scene in small increments. The series includes 81, 81A, 81B, 81C, 81D, and 81EF. The 81 filter provides the least warmth; the 81EF filter provides the most warmth. (The 81 filter adds very little to a scene, so we don’t recommend using it.) This series of filters is designed to counteract the blue/cyan colors frequently seen in the sky, by adding the opposite color to your image. Because the sky contains both blue and cyan (blue-green), these filters are a combination of red and yellow dyes. Unfortunately, the combination of blue and cyan varies with the time of day, season of the year, location and altitude. This variation in color creates a problem for filter manufacturers: they cannot make a set of filters to meet a definite condition because the conditions are always changing. As a result of these inconsistencies, each filter manufacturer has created an 81-series of filters that is consistent within their brand but usually cannot be substituted into another manufacturer’s filter series.

What this means for you is simple: buy one manufacturer’s brand, and stay with it. Buy the largest size you need and use step-up rings to adapt the filters to your smaller lenses, or buy a set of filters from a manufacturer such as Cokin that can be used with a filter holder on every lens you own. We have screw-on glass filters for our lenses. We prefer B+W, Tiffin, or Hoya; the filters made by Canon and Nikon are great, too, if you can find the ones you need.

We don’t carry the whole set of warming filters. We put an 81A filter on each lens we own and carry an 81B in the largest size we’ll need, along with step-up rings to adapt the filter to our smaller lenses. We use this filter frequently because we find ourselves photographing early in the day and/or in shadows, which means a blue cast is present on our scene. The 81A filter helps to remove this blue color cast. Combining an 81A and 81B will give you the same warming properties as an 81C without carrying an additional filter. Carrying the 81D and/or 81EF probably isn’t necessary, unless you find yourself creating images frequently in overcast or shaded light.


Having said that the reflected sky light is variable, we might need or want another warming filter besides the 81A. Also, we might wish to emphasize the cool blue light of the early morning. We can remove the 81A filter to allow more blue light to record on our film, or we might add a warmer filter, such as an 81B or 81C.

The decision to allow more blue light to be recorded on our film brings up another topic that we’ll save for another month: film choice. By now you’ve probably heard that each color transparency film has its own color palate. Some films emphasize the warmer (red, orange, yellow) part of the visible spectrum; other films emphasize the cooler (blue, green, violet) part of the spectrum. Thus, using the warming filters becomes a creative endeavor that includes consideration of the film we’ll be using and the final color rendition we wish to include in our image.

Split Neutral Density Filters: Our last set of filters includes a one-stop split neutral-density filter and a two-stop neutral-density filter. These filters must be rectangular filters that fit into a filter holder for rectangular filters, such as the Cokin P-style filter holder. Round split neutral-density filters that screw onto the camera lens are worthless. The rectangular filter can be adjusted up or down in the filter holder to divide your image into two portions: one portion that needs a reduction in the amount of light reaching the film, and the other portion that doesn’t need any reduction in light transmission. Be sure the filters are neutral density filters; some manufacturers call them gray neutral-density filters. Describing the use of split neutral-density filters is much harder in print than demonstrating its use. Find someone who uses them and buy the person lunch after they show you how to use this wonderful tool, or take a workshop with a knowledgeable instructor.

Categories
Photography

What is Photography?

What is photography? How exactly do cameras work? Funny you should ask such questions because I have done some research on the subject, and perhaps you may learn something very interesting in this post!

Traditional cameras, as I will call them, which are the ones that came before digital cameras, (if you can remember so very long ago) created images on photographic film.

When the light came through the lens when the trigger button was pressed, the light-sensitive surface of the film was exposed to the light and an image is created on the film.

Later, the film can be processed and chemically developed onto paper so you can cherish your memory. Nowadays, everyone from amateurs to professional paparazzi use digital cameras.

Digital cameras are truly a magnificent advance of the modern age. Digital cameras function differently from traditional cameras. They have an electronic image sensor that has an array of pixels.

When they are exposed to light, the light leaves the sensor with a charge at each pixel, and this data is collected and stored by the computer that is the digital camera.

The data can be read by a computer and display a visible image on a screen.

With traditional cameras, before there were color photos, all photos were black and white. Remarkably, we were able to create color photographs as early as 1861!

A physicist named James Clerk Maxwell created the concept of using red, green, and blue filters to create 3 different impressions with black and white photos and later a photographer could attempt to recreated the colors that were in the image at the time the photo was taken.

A photochemist named Hermann Vogel was able to add green, yellow, and red sensitivity to photo-sensitive materials using dye sensitization in 1873, which was not done up to that time.

Cameras are capable of taking pictures that are of light that is outside the range of human eye-sight! Since the 1960s we have been able to take pictures in ultraviolet or infrared.

These words are describing the light that is outside the range of visible light. Electromagnetic waves have a long range of wavelengths. Radio waves have long wavelengths, but travel at the speed of light.

Infrared waves have a smaller wavelength than microwaves, but larger than visible light. The same concept applies to ultraviolet light, except the wavelength is even smaller than that of visible light.

We can create visible images of these electromagnetic waves which is truly extraordinary. I really love science and I hope that you enjoyed this post as much as I did writing it!

Have fun photographing, and remember everything that goes into making that photo, when you push the button!

Categories
Science

Stickman – The Crohn’s vicissitudes: The best scientific picture of the year 2017

The image is part of a series called "Stickman - The Crohn's vicissitudes." Stickman is an alter ego of the artist, who suffers from Crohn's disease. In this picture stickman he is scolding his creator, the artist, to have drawn inspiration from his illness (Spooky Pooka).
“Stickman – The Crohn’s vicissitudes

The image is part of a series called “Stickman – The Crohn’s vicissitudes.”

Stickman is an alter ego of the artist, who suffers from Crohn’s disease. In this picture, Stickman is scolding his creator, the artist, brcause has got inspiration from his illness (Spooky Pooka).

Categories
Photography

Retina of a Mouse: The best scientific picture of the year 2017

The reconstruction of the retina surface of a mouse, digitally realized using over 400 images (Gabriel Luna, Neuroscience Research Institute, University of California, Santa Barbara).

Categories
War

SYRIAN DESPAIR, 27 April 2016

A Syrian boy is comforted as he cries next to the body of a relative who died in a reported airstrike on April 27, 2016 in the rebel-held neighbourhood of al-Soukour in the northern city of Aleppo.  / AFP / KARAM AL-MASRI        (Photo credit should read KARAM AL-MASRI
SYRIAN DESPAIR, 27 April 2016

KARAM AL-MASRI: “On 27 April 2016, I took this picture following Syrian government airstrikes on a hospital in the Sukkari neighborhood of east Aleppo. It was nine in the evening and I was at home when I heard the sound of a huge explosion. Fifteen minutes later, I headed to the area and saw that the hospital had been hit by several strikes, one hitting the hospital directly and the others the area behind it. I saw many dead people, some who had been walking past the hospital when the strikes hit, others who had been patients at the hospital or medical staff during their shift.

After I finished taking pictures of the hospital and the surrounding area, I decided to go to the medical clinic. Upon arriving I saw many bodies wrapped in plastic bags, some of them completely disfigured and others waiting to be identified. A couple of minutes later, this boy came into the clinic to look for his mother and little brother. He immediately recognized his brother’s body and burst into tears next to it.

He had lost a large number of his relatives. His father was killed not long ago as well. He was crying next to his brother’s body as some aid workers surrounded him trying to calm him down and console him. On that day that boy lost his mother too. Her body was in a big plastic bag under a table. Her face was completely deformed, disfigured, and he couldn’t recognize her in the beginning but was able to identify her later on through gold jewelry she was wearing.

The boy was crying and saying, ”I have no one left. Who will take care of me? Who will prepare food for me? Where will I live? Who will play with me?” At that moment the director of the clinic, Mohamed Kaheil, who is seen standing behind the boy comforting him, tried to calm him down, telling him, ”We are all your family members and siblings.”

When I started working as a photographer these scenes used to scare me and hurt me a lot. I remember the first time I took photos of people injured following an airstrike. I lost consciousness. I fainted after seeing people with cut-off limbs, and smelling blood and dead bodies. I have come up with a coping mechanism in order to deal with such harsh and cruel scenes. I no longer look at them with my eyes, I only look through the viewfinder while hiding behind my lens. I feel that my camera protects me as it creates a barrier between me and the reality of these scenes.

As for this specific image of the boy, it resonates a lot with me. I have a symbolic connection with this child, who reminds me of myself when I lost my family in shelling three years ago”.

Photo by BY KARAM AL-MASRI